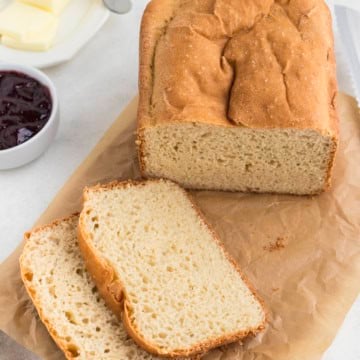
Gluten-free white bread recipe
Soft, fluffy gluten-free white bread made with pantry staples, prepared in minutes and left to bake in your bread maker.
Print
Pin
Servings: 1 loaf
Ingredients
- 2 ½ cups gluten-free all-purpose flour Buyer Note: I used this King Arthur Bread Flour: https://a.co/d/icYJiNu
- 2 tablespoons sugar
- 1 teaspoon salt
- 2 ¼ teaspoons RapidRise Instant Yeast one whole packet
- 1 ¼ cups warm water right around 110°F
- ¼ cup melted butter
- 2 large eggs whisked
- 1 teaspoon apple cider vinegar
Instructions
- Begin by making sure your bread maker pan is in place with the paddle attached.
- In a large mixing bowl, whisk together the gluten-free flour, sugar, salt, and yeast until everything is well blended. If you need to add xanthan gum to the recipe, this is when you will also be adding it to the recipe.
- Next, pour the warm water, butter, apple cider vinegar, and whisked eggs to the bread pan. You do not need to mix everything together.
- Once the liquid ingredients have been added to the bread pan, add the dry ingredient mixture on top of the liquid mixture. Once again, don’t worry about mixing everything together.
- Close the lid and select the “gluten-free” setting. If your bread maker does not have a gluten-free option, select the “basic” setting with a medium crust. The bake time for this should be about 2 hours and 10 minutes. However, each bread maker may vary.
- After the first 5 minutes, take a rubber spatula and gently press down the sides where the flour may have built up and gently fold the flour sections into the dough. I very carefully try to do this until there is no flour showing. Then, level the top of the dough mixture as much as I can to try and help the dough mixture ride level across the top and not in a wonky shape. Making sure the flour is thoroughly mixed in during this step will help prevent pockets of flour on the sides.
- Close the lid and allow the bread maker to finish the remaining time by running through all of the cycles. Do not open the lid going forward.
- Once the bread machine is done, carefully remove the pan using oven mit. The pan and handle may still be warm to touch. Very carefully remove the bread from the pan by flipping the bread pan over onto a wire rack. Allow it to cool completely before slicing or before attempting to remove the paddle if it gets backed into the bread.
- Serve and enjoy!
Equipment
- 1 bread maker
Notes
1. When adding the wet ingredients to the pan, add the eggs last so the warm water doesn’t alter them.
2. Allow the bread to cool completely before slicing it. The bread will become firm and create a perfect texture by allowing it to cool completely.
3. Try adding flavors to the bread for variations. Some ideas may include fresh herbs or garlic, seeds, nuts, seeds, etc. Modifying the recipe may alter the texture and flavor.
Nutrition
Calories: 1626kcal | Carbohydrates: 242g | Protein: 42g | Fat: 65g | Saturated Fat: 32g | Polyunsaturated Fat: 5g | Monounsaturated Fat: 17g | Trans Fat: 2g | Cholesterol: 449mg | Sodium: 2816mg | Potassium: 140mg | Fiber: 31g | Sugar: 35g | Vitamin A: 1893IU | Calcium: 265mg | Iron: 12mg
Nutrition Disclaimer
All nutritional information provided is an estimate. For specific dietary needs or concerns, we recommend consulting a nutrition calculator or a qualified expert.

Tried this recipe?Mention @seasonal_cravings or tag #seasonal_cravings and I will repost on my stories.