

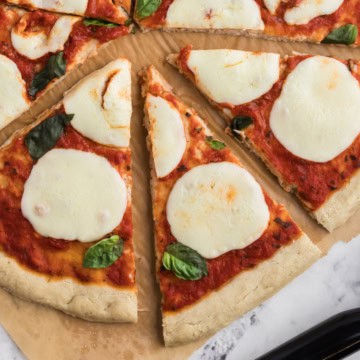
This Gluten Free Pizza Dough comes out soft in the middle with a crisp, sturdy edge that will not sag under a pile of toppings.

You can make it two ways. The bread machine does the mixing and the rising for you, which takes the guesswork out of gluten free yeast dough. Or you can mix it by hand in a bowl and let it rise on the counter for an hour. Same ingredients, same amounts, same crust at the end.
Either way, there is no kneading, because there is no gluten to develop.
Fair warning before you start. This dough will not look like pizza dough. It looks like thick batter, and that is exactly right. Oiled hands and a bit of patience will spread it out.
Ingredients
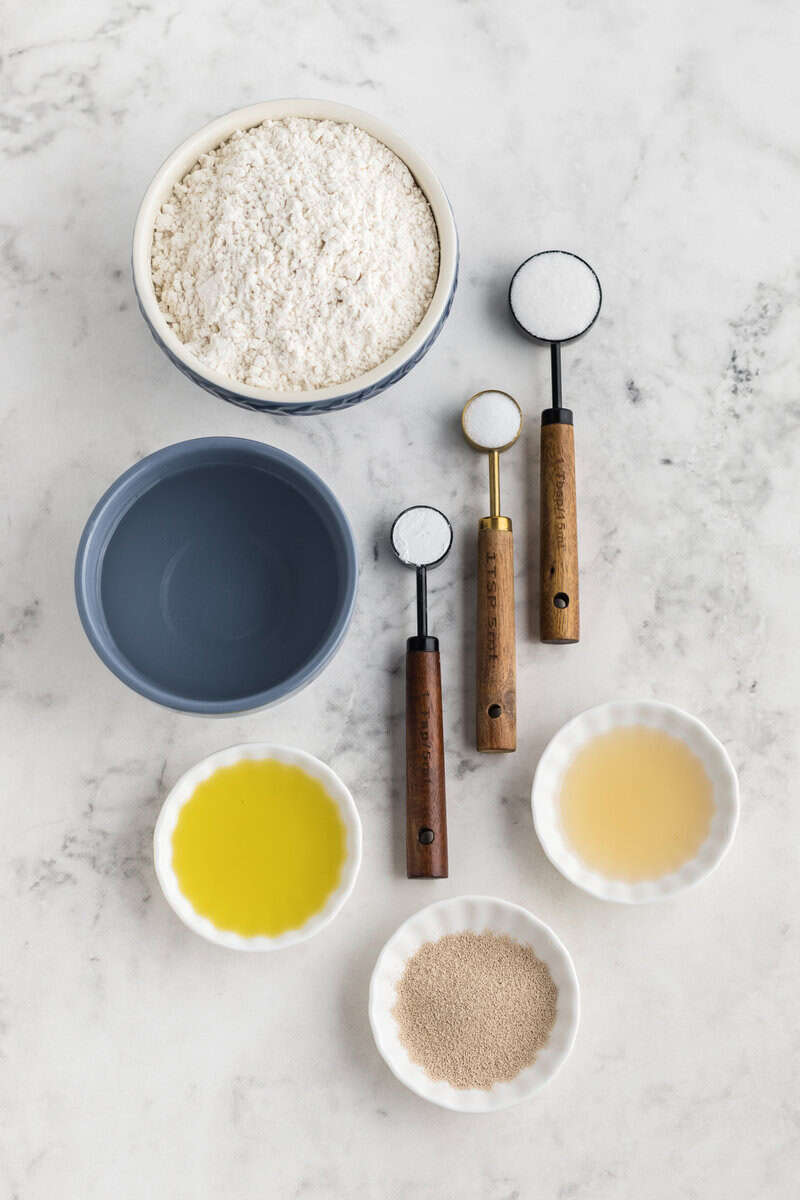
- Gluten free flour blend: A blend with xanthan gum is essential for structure and elasticity. Without it, the dough won't hold together properly.
- Yeast: Provides lift and chew. Keeping it dry until you start mixing is key for proper activation.
- Apple cider vinegar: Improves the texture and flavor. Vinegar keeps the dough nice and tender.
- Olive oil: Adds richness and keeps the crust from drying out during baking.
See recipe card for quantities.
Instructions
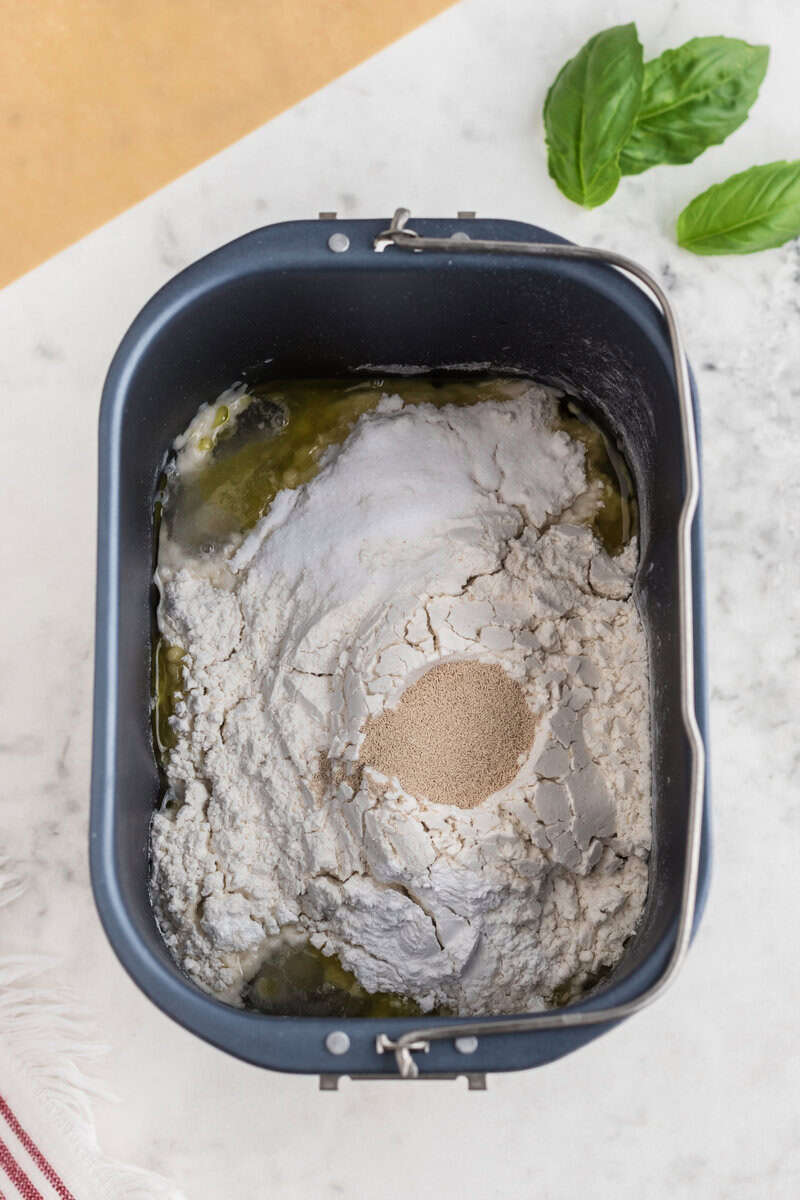
- Step 1: Add the warm water, olive oil and apple cider vinegar to the bread machine pan. Layer the dry ingredients on top in this order: sugar, gluten-free flour (plus xanthan gum if needed), salt and baking powder. Do not stir. Make a well, add the yeast. Make the dough.
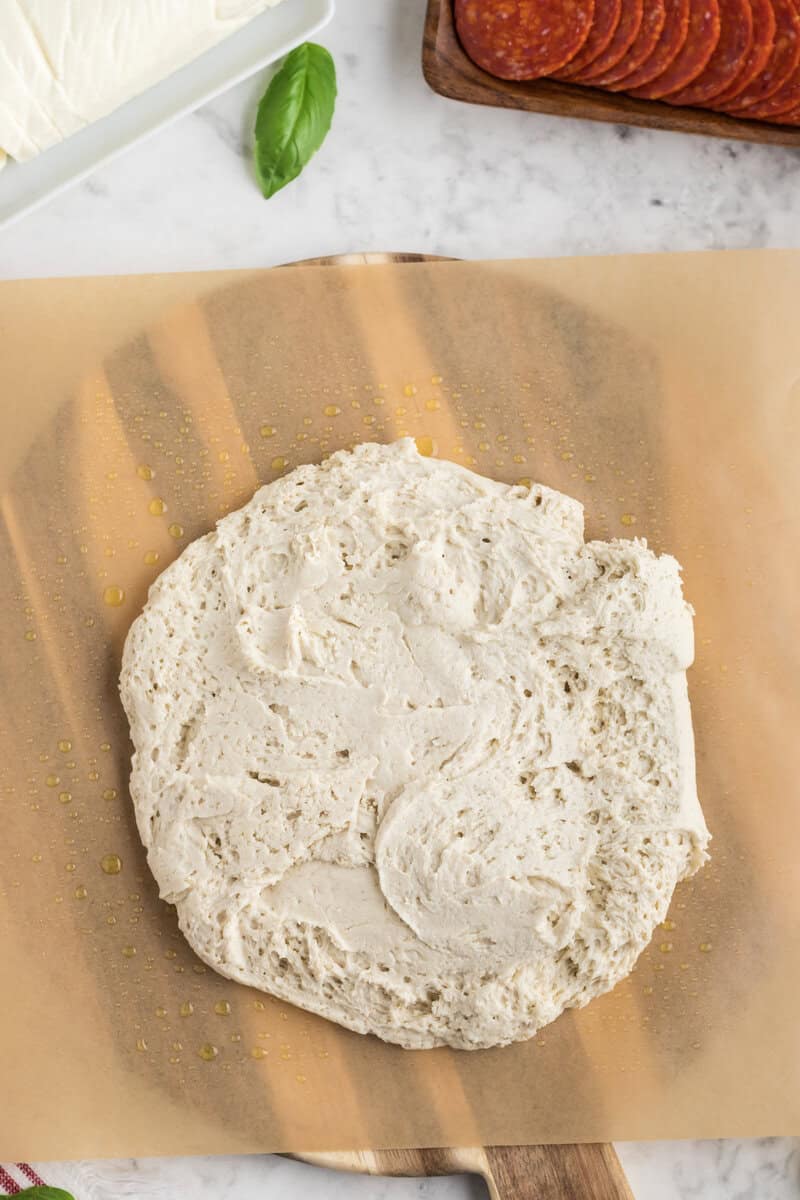
- Step 2: When the cycle finishes, the dough will resemble thick batter. Scrape it onto a lightly oiled pan or parchment-lined baking sheet.
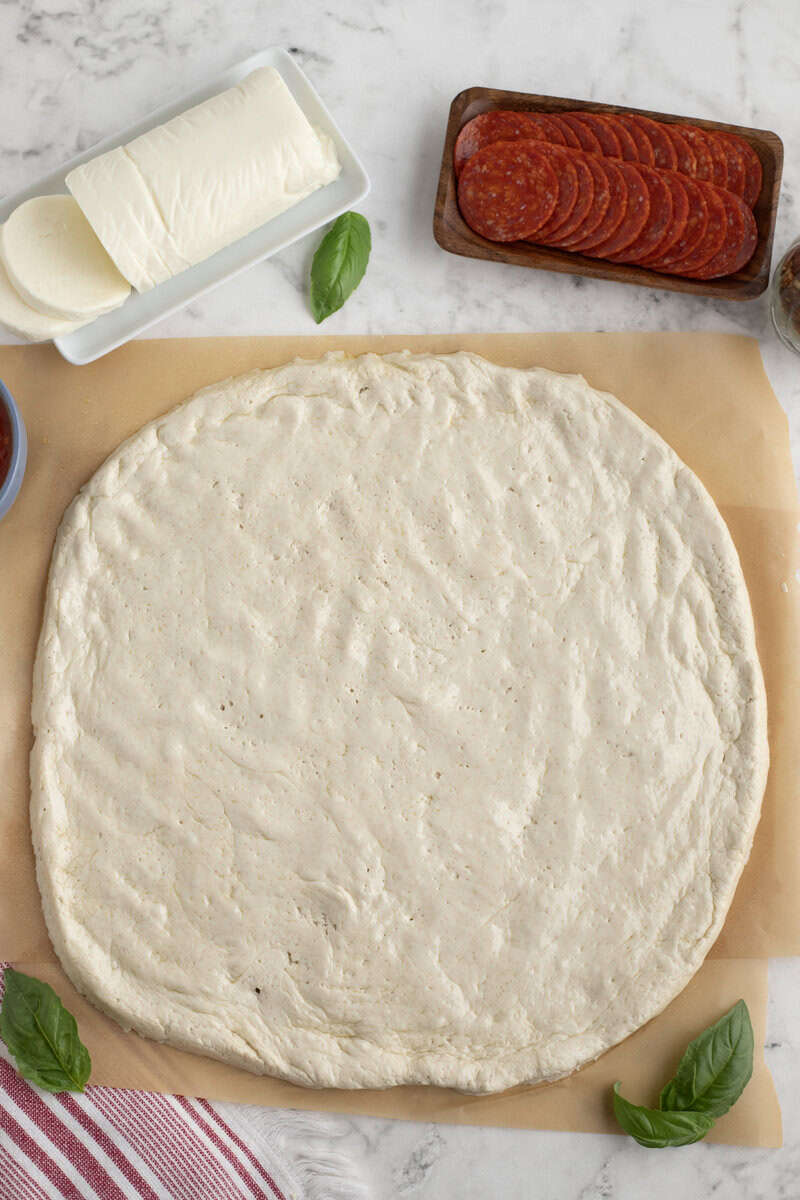
- Step 3: Using oiled hands, gently spread the dough into a pizza shape, keeping it about ¼-½ inch thick.
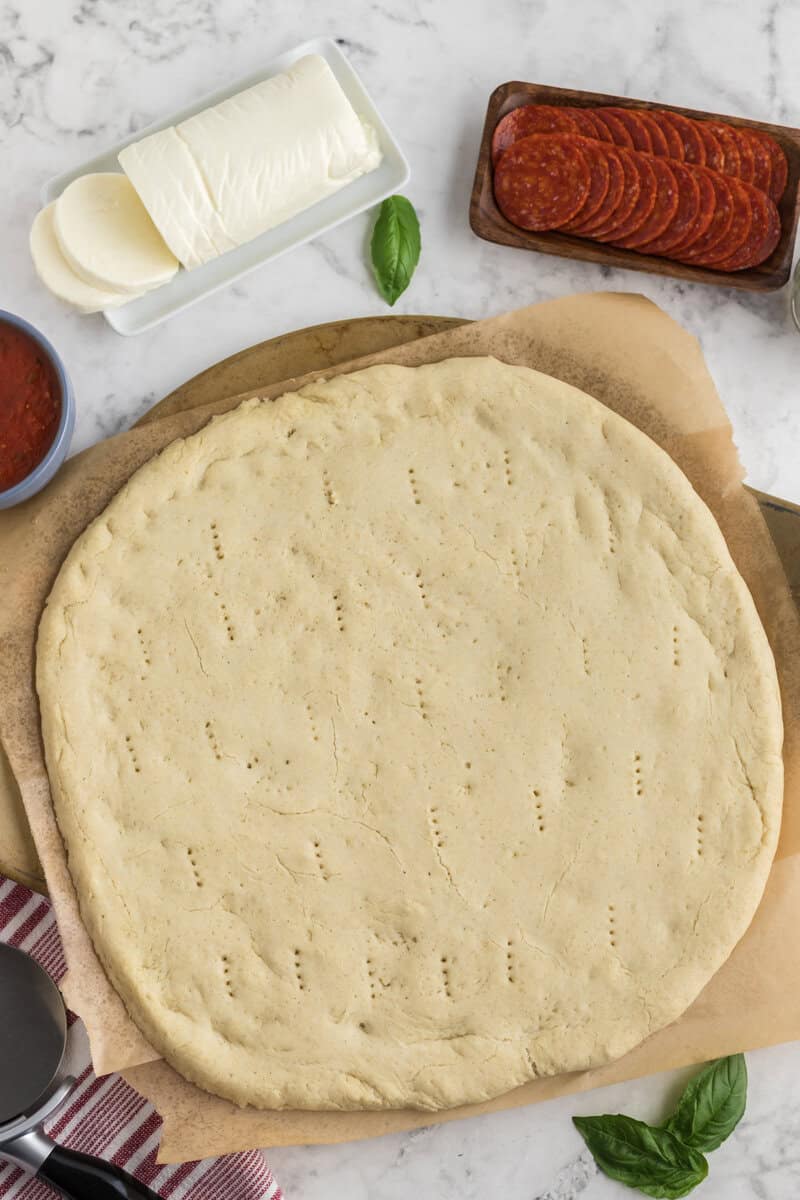
- Step 4: Use a fork to prick the surface of the dough all over to prevent air bubbles. Bake.
If you have a bread machine, it does the work for you. If you do not, skip down to the hand-mixed method below.
How to Make Gluten Free Pizza Dough Without a Bread Machine
No bread machine? You can mix this by hand. Same ingredients and same amounts; you are just doing the job the machine would do and letting the yeast rise on the counter.
1. Put the warm water and sugar in a large bowl and stir in the yeast. Let it sit about 5 minutes until it looks foamy.
2. In a second bowl, whisk the gluten free flour, salt, and baking powder together, plus the xanthan gum if your blend does not already have it.
3. Add the olive oil and apple cider vinegar to the yeast mixture. Add the dry ingredients and stir hard with a sturdy wooden spoon or a rubber spatula until everything is fully combined. It will be much softer and stickier than regular pizza dough.
4. Cover the bowl with a clean towel or plastic wrap, put it somewhere warm, and leave it alone for about an hour.
5. Heat the oven to 425 degrees. If the dough is very sticky, chill it for 15 minutes first. It handles a lot more easily when cold.
6. Scrape the dough onto a lightly oiled pan or a sheet of parchment. Oil your hands and press it out into a pizza shape about a quarter to half an inch thick. Resist the urge to add flour; it will dry the crust out.
7. Prick the surface all over with a fork and bake the empty crust for 8 to 10 minutes.
8. Add your sauce, cheese, and toppings and bake another 8 to 12 minutes, until the cheese has melted.
9. Let it sit a few minutes before slicing.
Why you pre-bake the crust
Bake the empty crust for 8 to 10 minutes before anything goes on it.
Skip this, and the sauce soaks into dough that hasn't set yet, so you get a soggy middle no matter how long you leave it in. Prick the surface all over with a fork first so it does not puff up in the oven.
Then add your sauce, cheese, and toppings and give it another 8 to 12 minutes.
Substitutions
- Olive oil: Swap with avocado oil or melted dairy free butter if needed.
- Sugar: Use honey or maple syrup (same amount) for a more natural sweetness.
- Apple cider vinegar: Replace with white vinegar or lemon juice in equal amounts.
Variations
- Garlic herb crust: Add 1 teaspoon garlic powder or Italian seasoning to the dry ingredients for extra flavor.
- Thicker pan style pizza: Spread the dough slightly thicker and extend the baking time by a few minutes for a heartier crust.
- Mini pizzas: Divide the dough into smaller portions and shape individual pizzas; great for kids or a variety of toppings.
Equipment
A bread machine makes this hands-off, but you can mix it in a large bowl with a sturdy wooden spoon instead. Either way, you want a rubber spatula, a pizza pan or baking sheet, parchment paper if you like an easy transfer, and a fork for pricking the crust.
Storage
Because this dough is yeast-based, it's best to bake it before storing. Keep baked pizza or pre-baked crusts in the fridge for up to 4 days or freeze fully cooled pre-baked crusts for up to 2 months to preserve texture and rise.
Top tips
Check the dough 5 to 8 minutes into mixing so you can adjust early; add 1 tablespoon warm water if it looks dry or 1 tablespoon gluten free flour if it's too thin.
Use oiled hands when shaping the dough; extra flour can dry it out.
For extra flavor, add 1 teaspoon seasoning (like garlic powder or Italian seasoning) to the dry ingredients.
Baking time depends on thickness: thinner crusts bake faster, thicker crusts need more time.
FAQ
Because the yeast is sensitive, I highly recommend adding the ingredients in the order listed above.
Yes. Mix it by hand in a bowl and let it rise on the counter for an hour. The full method is written out above. The ingredients and amounts do not change at all.
Because it should. Gluten free pizza dough is much wetter than regular dough, and it will not form a ball you can pick up. Scrape it onto an oiled pan and spread it with oiled hands.
Freeze it after the pre-bake rather than raw. Let the crusts cool completely, then wrap and freeze for up to 2 months.
About a quarter to half an inch. Thinner bakes faster and crisps more, thicker takes a few extra minutes and gives you more chew.
Related
Looking for other recipes like this? Try these:
Gluten Free Pizza Dough
Ingredients
- 1 cup + 3 tablespoons of warm water - about 110°F
- 3 tablespoons olive oil
- 1 teaspoon apple cider vinegar
- 1 tablespoon sugar
- 2 ½ cups gluten-free flour blend with xanthan gum - If your blend does not contain xanthan gum add 1 ½ teaspoons
- 1 teaspoon salt
- 1 teaspoon baking powder
- 2 ¼ teaspoons active dry yeast or instant yeast
Instructions
- Begin by adding all of the wet ingredients to the bread machine pan. This includes warm water, olive oil, and apple cider vinegar.
- Then, add the dry ingredients in this order to the bread machine pan. This includes the sugar, flour, xanthan gum if your flour does not contain it, salt, and baking powder. Do not mix the wet into the dry ingredients. They will combine when the machine starts. Make a small, shallow well at the top of the dry ingredients and place the yeast in it. This allows the yeast to stay away from the wet ingredients until the machine begins mixing.
- Securely add the bread machine pan to the bread machine. My machine makes a loud "click" when the pan is fully in place.
- Select the "dough" cycle on the machine. The "gluten free" option will turn it into bread, so you do not want to select that.
- Keep an eye on your dough after a few minutes to make sure no flour is stuck to the walls. You can use a rubber spatula and quickly push down any that you may see.
- Allow the machine to run the remainder of the process.
- Preheat your oven to 425°F.
- Once your machine finishes, your dough will look like thick batter. Scrape the dough onto a lightly oiled pan or sheet. Using oiled hands, gently and evenly spread the dough into the pizza shape you desire. Be sure to leave the thickness of the dough about ¼ to ½ inch thick. If you choose to have a thicker edge, now would be the time to form it. *Note: You can form your dough on parchment paper and then transfer the parchment paper onto a pan for baking. Whichever is easiest for you!
- Once your dough has been formed, take a fork and prick the unbaked crust all over to prevent any air pockets from forming.
- Bake the empty crust for about 8 to 10 minutes before adding your pizza toppings.
- After the pre-bake, add your sauce, seasonings, cheese, and toppings of choice. Return the pizza to the oven and bake for an additional 8 to 12 minutes or until the cheese is fully melted.
- Remove from the oven and allow the pizza to cool slightly. Using a pizza cutter, slice the pizza and serve.
Equipment
- 1 Bread Machine
Nutrition Disclaimer
All nutritional information provided is an estimate. For specific dietary needs or concerns, we recommend consulting a nutrition calculator or a qualified expert.


Karen Kelly
Karen Kelly is a nationally syndicated food and travel writer, founder of Seasonal Cravings, and co-founder of The Roam Report. She develops approachable seasonal recipes and covers travel and lifestyle trends. Her work has appeared in numerous media outlets, including Yahoo, Taste of Home, Apple News, NBC, FOX, and other national and regional publications.
Tell Us What You Think